Tomatoes are one of the most popular crops among home gardeners, and with good reason: not only are tomatoes delicious and versatile, they are relatively easy to grow and return high value for the space they occupy. No store-bought tomato can compare with the flavor of a vine-ripened tomato picked from the garden at its peak of ripeness.
A perennial plant in its native tropics, tomato belongs to the nightshade family (Solanacae) and is native to Central and South America. The tomato appeared in European cuisine in the 16th century, although it did not become popular there until the 18th century because of the common belief that it was poisonous.
Soil Requirements
Tomato plants will grow well in well-drained sites that receive full sun for most of the day. The soil pH should be slightly acidic (6.2 to 6.8). Excess nitrogen can result in plants with lush, vigorous foliage but little fruit production. Although it is best to determine lime and fertilizer needs from the results of a soil test, a rule of thumb for gardeners lacking test data is to apply 2½ pounds of a complete fertilizer such as 10-10-10 (or the equivalent) per 100 square feet of garden area. Work the fertilizer into the soil about 2 weeks before planting.
Selecting the Right Variety
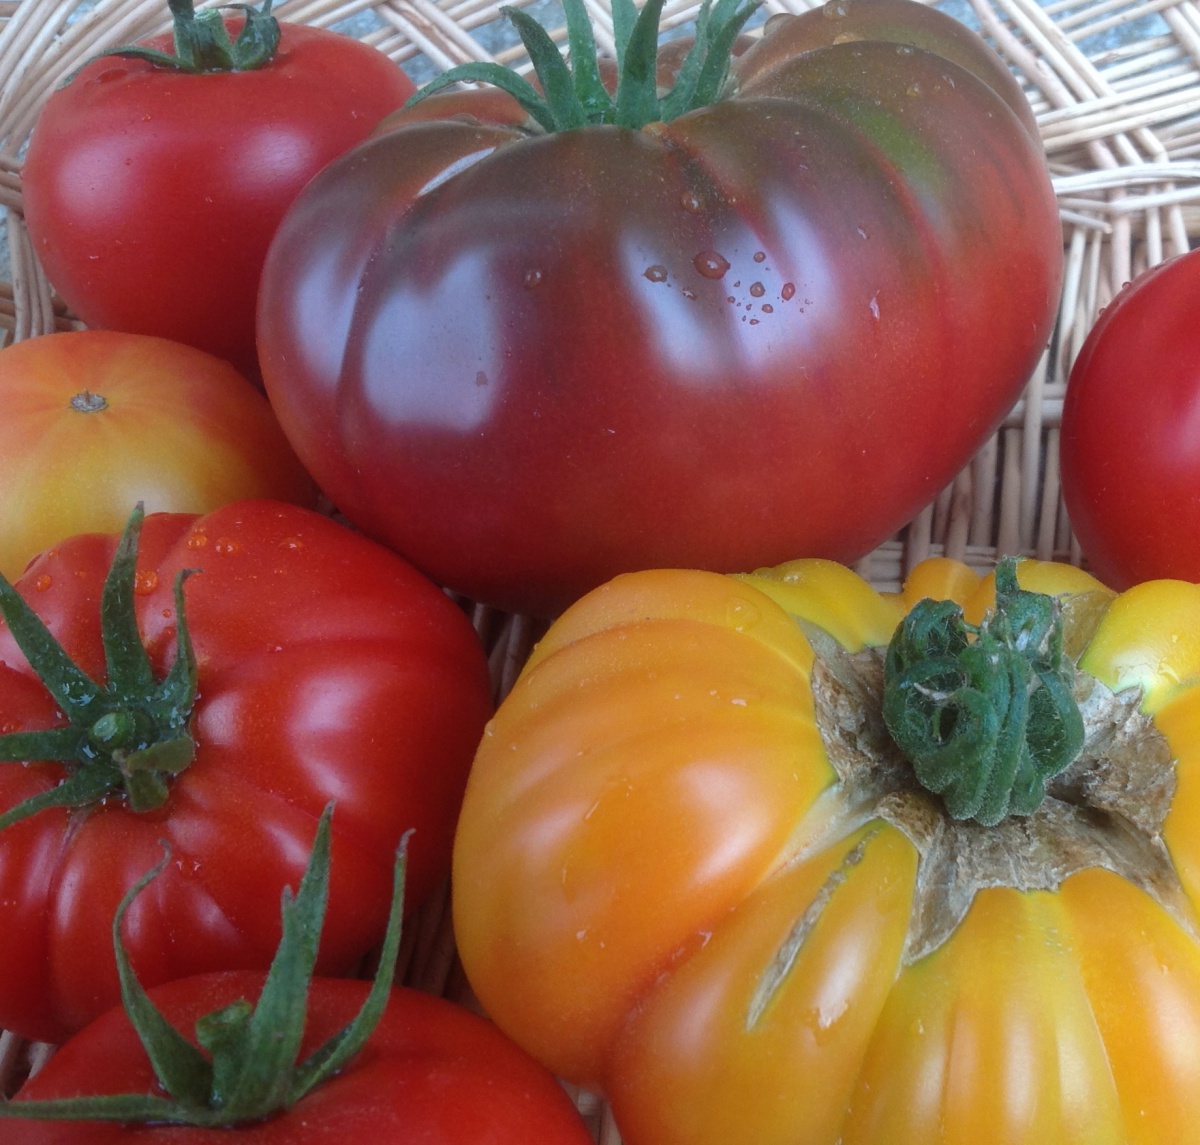
Hundreds of tomato varieties exist to suit every climate, garden site and taste. There are tomatoes that ripen in 55 days and varieties that require three months of hot weather to produce their crop. Some produce vines that will sprawl 25 feet if not maintained by pruning, while others are only 8 inches high at maturity. Fruit range in size from as small as marbles to as large as grapefruits. And the array of colors! With so many varieties available, how do you pick the one or ones that are right for your garden?
- Select varieties that have been bred to grow and produce well in our short growing. A good way to do this is to choose varieties that have been tested under local conditions.
- Is the variety determinate or indeterminate in growth habit? Determinate tomato plants grow to a certain height and then stop. They flower and set their fruit within a relatively short period of time. Indeterminate tomato varieties grow, flower, and set fruit over the entire growing season. The vines continue growing throughout the season too, so these varieties should be staked, caged or pruned.
- How you will use the tomatoes? Are you looking for large fruit for slicing? Medium-sized fruits to slice or chop into salads and salsas? Tiny sweet fruits for lunch boxes? Tomatoes for canning or juicing or drying? Many gardeners continue growing old-fashioned, “heirloom” varieties that have been favorites for generations because of their exceptional flavor or unusual appearance.
- Resistance to diseases, stresses, and disorders can be an important consideration, especially for growers who have experienced these problems in the past. Many variety names are followed by one or more letters indicating resistance to Verticillium wilt (V) or Fusarium wilt (F) diseases, for example, and some varieties are less likely to experience problems such as cracking and yellow shoulders.
Most gardeners do not raise their own tomatoes from seed and may be limited to those varieties offered by local garden centers. Ask sales staff for information, read label descriptions and talk to fellow gardeners about their which tomato varieties they prefer and why. Whether you buy seedlings or start your own, try two or three plants of a different tomato variety each year just for fun and adventure.

Purchasing Tomato Seedlings
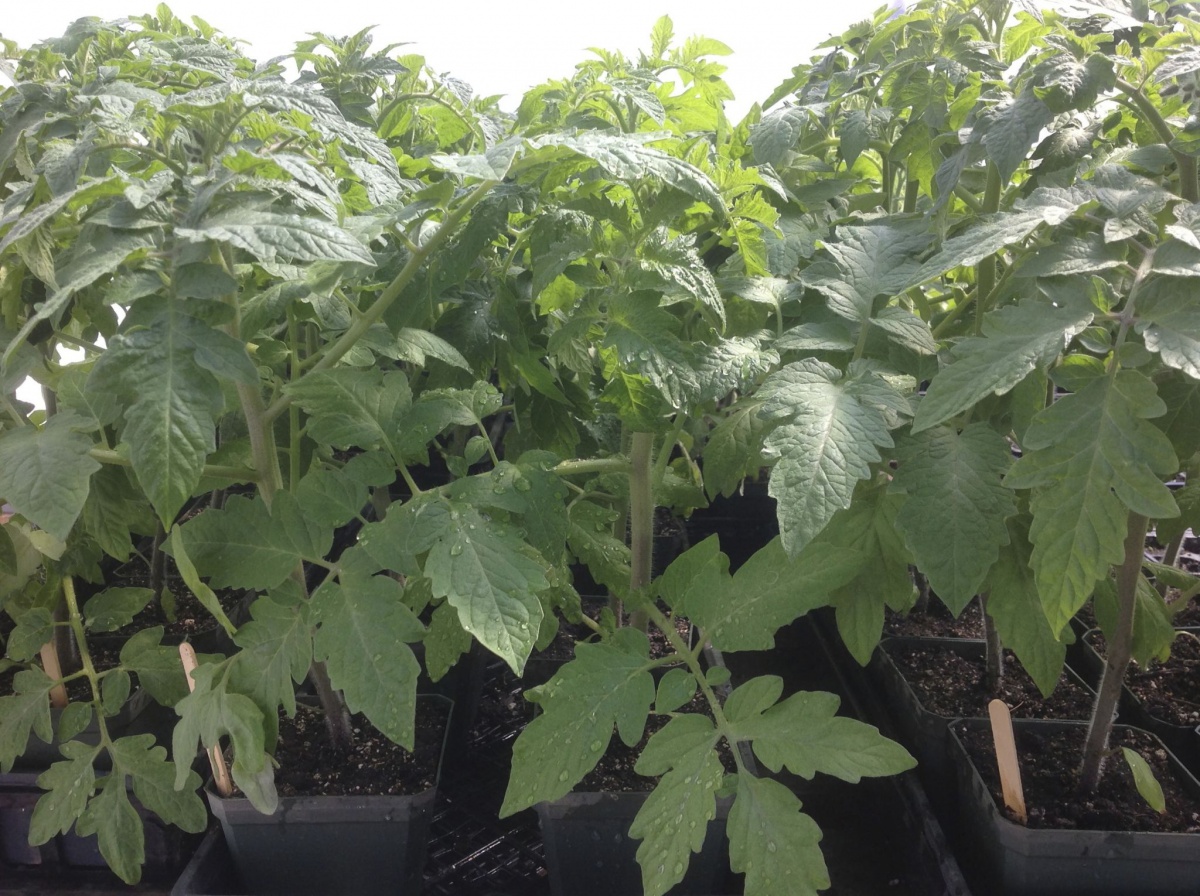
Because of their long growing season and temperature requirements, tomatoes must be started indoors six to eight weeks before being moved permanently into the garden. When purchasing tomato seedlings, select stocky plants with thick, straight stems and bright green leaves. The ideal transplant is less than six inches tall, as broad as it is high. Do not choose tall, lankyplants, or large, well-established plants with flowers or fruits already visible.
Plants growing in cell packs or individual containers are better choices than those growing in flats, as their roots will suffer less transplant shock. Seedlings should be free of insects and visible signs of disease.

Hardening Off
Whether your plants are purchased or homegrown, harden off tomato seedlings before transplanting into the garden. About ten days before transplanting, set plants outdoors for a few hours each day to acclimate them gradually to outdoor conditions. Start by setting plants in filtered light in a setting protected from strong breezes. Each day, prolong the period the tomato seedlings spend outdoors, exposing them gradually to direct sunlight and wind. Remember that seedlings lose water much more rapidly outdoors than inside and will need more frequent watering during the hardening off process.
Bring plants indoors at night and on days when temperatures fall below 60°F. Below this temperature, tomatoes experience chilling injury, which can delay their growth and may cause a condition called “catfacing” on early fruit.
Transplanting
Wait until danger of frost has passed and soil temperatures have warmed to about 60°F before setting tomatoes into the garden. Throughout much of New Hampshire, Memorial Day weekend is a safe time for transplanting tomatoes, though southern gardeners may often plant a week or two earlier and growers in the northern frost pockets may need to wait until mid- June.
The ideal spacing for tomato plants depends on the growth habit of the variety and whether plants will be pruned:
- Staked or caged plants: 18 to 24 inches between plants, in rows at least 5 feet apart.
- Unstaked determinate plants: 12 to 24 inches between plants, in rows 4-6 feet apart.
- Unstaked indeterminate plants: 2 to 3 feet between plants, in rows 5-7 feet apart.
Use a trowel to dig a hole about twice the size of the tomato seedling and its root ball; set the seedling into the ground at the same level as it grew in its container. Make sure to cover the root ball entirely. If seedlings are growing in peat pots, peel back the rim of the pot so the entire pot is buried below the soil surface, because an exposed peat pot will wick moisture from the soil.
To reduce transplant shock and hasten establishment of seedlings, irrigate the newly-set transplant well with water or with a dilute fertilizer solution.

Container Growing
Where space is limited or conditions are not suitable for tomato culture, tomatoes may be grown in containers. Although any large container will work as long as it provides adequate drainage; a general recommendation is to plant one tomato plant per four or five-gallon container. Grow containerized tomatoes in artificial potting mix; do not use regular garden topsoil or homemade compost. Pay special attention to water and fertilizer needs, as container-grown tomato plants have no access to the deep soil reservoir of water and nutrients. Most containerized tomato varieties require a stake, trellis or other support.
Cultural Practices
An even moisture supply throughout the time the fruit is developing helps prevent a condition called blossom end rot, as well as for supplying the water needed to develop the fruit - too much water at any one time may cause ripening fruit to split.
Pruning, or selectively removing some of the tomato plant growth, can improve harvestable yields and prolong the harvest season. It can also help reduce some disease problems. The ideal pruning system depends on whether the tomato is a determinate or an indeterminate variety. For more information on pruning methods, please see the fact sheet Pruning Tomatoes. If you plan to use stakes or cages, install them at planting time, rather than later when the plants’ roots are established.
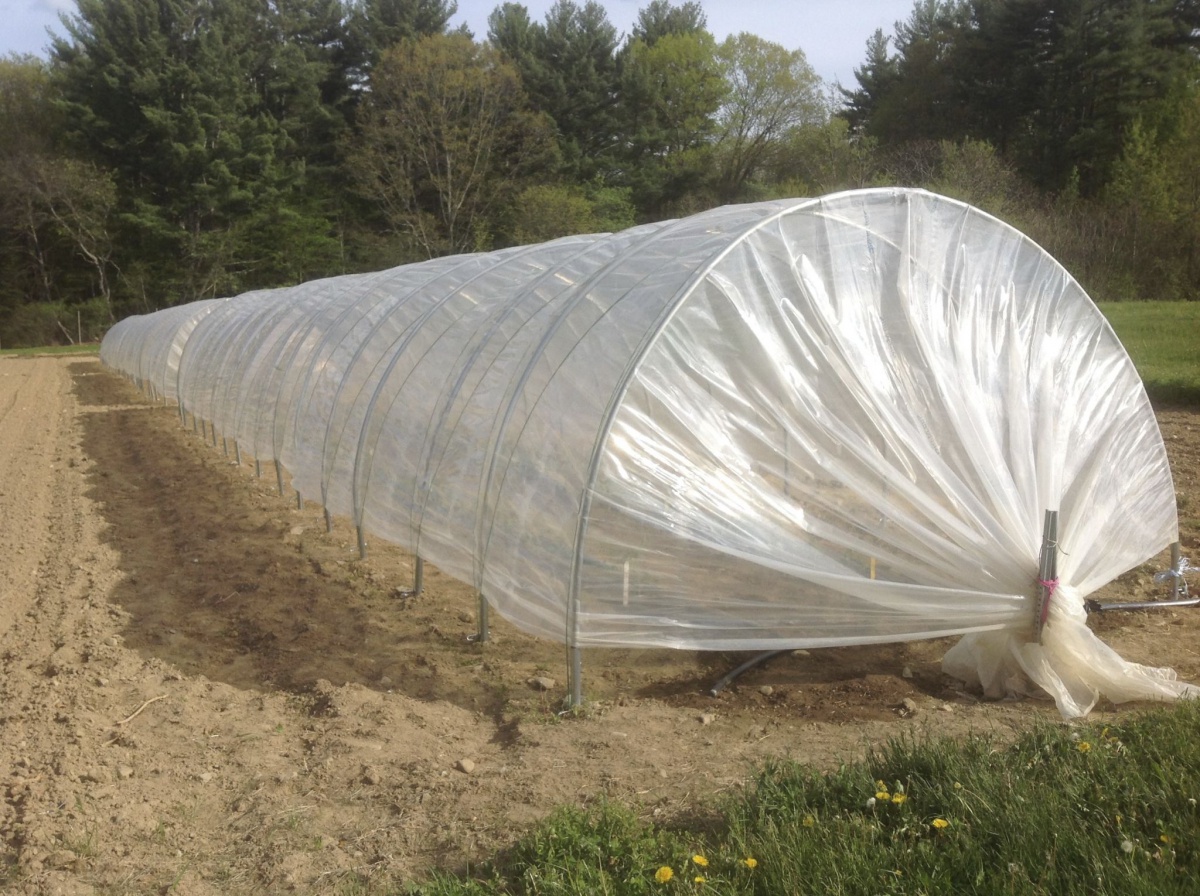
Commercial farmers often grow tomatoes in unheated greenhouses called high tunnels. Keeping the plants under cover keeps the leaves drier, which reduces leaf diseases that are very common problems, such as early blight and Septoria leaf spot. Growing tomatoes under cover can also increase crop yields and quality, while allowing you to work in the crop in inclement weather. Inexpensive temporary tunnels, sometimes called “caterpillar tunnels” are one way to create such a cover for tomatoes, and this strategy may be worth considering if you have a history of crop losses from diseases.

Many growers use mulches around the base of tomato plants. Plastic mulches retain soil moisture, raise soil temperature during the early part of the season, and help stabilize soil temperatures throughout the summer. Black plastic mulch suppresses weeds, and also protects the fruit of unstaked plants from coming into contact with soil. Organic mulches offer the same moisture retaining, weed suppressing and fruit protecting advantages as plastic, and eventually decompose, adding to the soil’s supply of organic matter. Tomatoes can be mulched with a thick organic mulch of straw, pine needles or leaves, spread two to four inches deep around plants. Because organic materials delay soil warming, wait until the soil is thoroughly warm before applying these mulches.
Common Problems
Flea beetles may attack young tomato plants. Protect new transplants from this insect during their first two or three weeks of growth with spun-bonded floating row covers. Because tomato seedlings are fragile, drape the row cover over wire hoops or a simple wooden frame to hold it above the plants.
Cutworms are soil-dwelling caterpillars that feed on stems at or just below the soil level, essentially cutting off transplants at the base. This damage can be prevented by using a protective cutworm collar that goes one inch deep and about two inches high around each newly-set transplant. A small paper cup with the bottom removed or a cut-to-size length of stiff paper or plastic, folded into a cylinder and secured with a paper clip are two inexpensive ways to fashion cutworm collars. You could also consider using cutworm bait, if you have a lot of plants to protect and a significant problem.
Hornworms are very large, green caterpillars that feed on the foliage (and sometimes the fruit) of tomatoes. There are two species in New Hampshire, the tobacco hornworm, and the tomato hornworm. Because they blend in with the tomato foliage, it can often be hard to see them until after they have done a lot of damage. They can be easily managed with a biological insecticide or by hand removal. For more information, please refer to the fact sheet: Hornworms on Tomatoes in New Hampshire.
Septoria leaf spot, Early blight, and Late blight are all fungal diseases of tomato. The fungi that cause Septoria leaf spot (Septoria lycopersici) and early blight (Alternaria solani) overwinter on plant debris in the soil. Both are common causes of spots on tomato leaves, with symptoms usually beginning on the lower leaves. Septoria is usually more severe because it can eventually cause the plants to be defoliated and also causes spotting on the stems and petioles. Late blight, caused by Phytophthora infestans, does not overwinter in our soils, and arrives via storms each year, usually late in the season. Although it does not cause leaf spots, it does blight leaves, stems and fruit, and can kill plants very quickly. If you suspect fungal diseases are affecting your tomato crops, it is important to identify the disease in order to manage the disease effectively. To help identify problems, you can call our Infoline at 1-877-EXT-GROW (1-877-398-4769) or submit samples to the NH Plant Diagnostic Laboratory.
Extension Services & Tools That Help NH Farmers Grow
Newsletters: Choose from our many newsletters for production agriculture
Receive Pest Text Alerts - Text UNHIPM to (866) 645-7010


