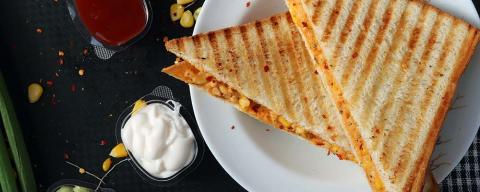
Break out of the traditional grilled cheese sandwiches to something new and exciting! Get creative with grilled cheese to make it even tastier and more nutritious. Here are some ideas for you:
- Try different kinds of cheese to find out what you like best
- Cheddar (sharp or mild)
- Mozzarella
- Colby
- Swiss
- Goat cheese of various types
- Sheep cheese
- Cream cheese (try this with fruit for a sweet grilled cheese)
- And more – let your imagination run wild!
- Try different kinds of bread to find out what you like best
- White
- Whole wheat
- Multi-grain
- Cinnamon bread (Hmmm, maybe this would be great with grilled cream cheese and fruit!)
- Anadama
- Do you have family bread recipes you can try? Or look in a cookbook, go online, or try the bread recipe below.
- And more – let your imagination run wild!
- Use REAL butter – try salted vs. unsalted and see how the taste changes. Or make your own butter (see recipe below) – which is better, your homemade butter or store bought butter?
- Add one or more of the following fruits and/or veggies to add taste and nutrition!
- Tomato (maybe with a little fresh basil)
- Avocado
- Spinach or other greens
- Apple or strawberry
- And more – let your imagination run wild!
- What else can you add?
- Dressings
- Toppings
- Meats
- Herbs and spices
- And more!
How to Make Bread
Try this recipe or use your favorite.
Bread in a Bag Recipe
Ingredients:
- 1 gallon-sized resealable plastic bag
- 3 cups flour
- 1/4 cup sugar
- 1 packet (2 ¼ tsp) yeast (rapid rise or regular)
- 1 cup warm (not hot) water
- 1/4 cup butter, melted
- 1 teaspoon salt (this can be to taste)
Directions:
- Combine 1 cup flour, sugar, and yeast packet in a bowl. Pour into a resealable bag.
- Add warm water. Seal bag, pressing out air.
- Begin shaking and mixing the bag by hand.
- Set bag to rest for 10 minutes (proofing).
- In a bowl, combine 1 cup of flour with salt. Pour into the bag you made earlier, then add the melted butter.
- Seal the bag again, pressing out air. Shake and mix again.
- Open bag and add in last cup of flour.
- Seal bag, and mix for final time.
- Remove the dough from the bag and place it on a floured surface.
- With floured hands, knead dough for 5-10 minutes.
- Place the dough in a greased loaf pan.
- Lay a towel over the loaf pan and let rise in a warm spot for 45 minutes.
- Bake in a preheated 375 degree F oven for 25 minutes (until browned on top and sounds hollow when you tap it)
How to Make Butter
Ingredients:
- ½ pint of heavy cream
- 1 clean pint jar or other similarly-sized container with a tight cover or lid, preferably plastic
- 1 clean marble (or a similar smooth, clean object)
Directions:
- Take your jar and place the marble inside
- Pour the cream into the jar and screw the cover on tightly
- Shake the jar. A figure-eight motion seems to work best; be careful if the jar is glass). If you have a plastic container with a tight lid, you can even roll it back and forth.
- Listen for the marble bouncing up and down.
- After the marble cannot be heard anymore, you’ll know the cream is thickening. Keep shaking, and you will soon start to see the glob of butter form. The marble will go silent as it is enveloped by the butter.
- Find and remove the marble
- Place the butter into a container of your choice to store or use
What is the science magic that has just unfolded before your eyes?
Heavy cream is what is called an “emulsion”. An emulsion exists when tiny droplets of one type of liquid are floating around in another type of liquid that does not like to mix with the first. In the case of heavy cream, tiny globules of fat are suspended in mostly water. By shaking the heavy cream in the jar, you are forcing the fat globules to slam into one another. If they hit each other with enough force, they will simply stick together, the fat collection becoming bigger and bigger with each extra globule. After enough shaking, the fat globules form a chunk of butter.
To take this experiment even further, try different types of cream, such as light cream or whipping cream; each of which has different fat content. Compare the shaking time needed, the amount of butter created, and the butter’s taste at the end. Also experiment with different temperatures. This experiment is definitely a workout as it will require a good amount of shaking!

