Indoor Herb Gardens Over Winter, Old Seeds, Safe Ice Removal and Borage [audio]
▶ Play Episode
SHOW NOTES
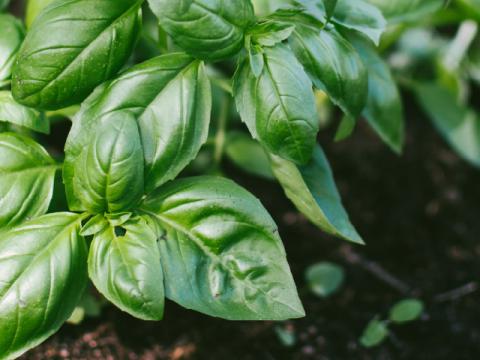
Herbs are delicious and fragrant additions to a garden, whether a dedicated kitchen garden or as ornamental and edible accents in vegetable and flower gardens. But herbs can also be grown inside your home, protected from the elements and even closer to your kitchen. Whether you’re growing herbs as houseplants year-round or just to get them through the winter before they go back outside, indoor herb gardening is rewarding as long as you are able to provide the care they need to thrive.
In this episode of Granite State Gardening, UNH Extension’s Emma Erler and Nate Bernitz share proven tips and solutions for all aspects of indoor herb gardening — from seed starting and care of newly purchased potted herbs to indoor/outdoor transitions and drying and cooking from your homegrown harvest.
Featured question: germination testing of old seeds
Featured plant segment: borage
Closing gardening tip: removing hazardous ice without harming your garden’s soil.
Connect with us at @askunhextension on Facebook, Instagram and Twitter and subscribe to the monthly Granite State Gardening newsletter.
Email us questions, suggestions and feedback at gsg.pod@unh.edu
Background Reading
- How to keep potted herbs from the supermarket alive longer: https://extension.unh.edu/blog/how-can-i-keep-potted-herbs-supermarket-alive-longer
- Soil for potted plants: https://extension.unh.edu/blog/what-best-soil-potted-plants
- Preserving herbs: https://extension.umn.edu/preserving-and-preparing/preserving-herbs-freezing-or-drying
- Cooking with herbs: https://extension.umd.edu/hgic/topics/tips-cooking-fresh-herbs
- Germination testing: https://extension.unh.edu/blog/are-my-leftover-seeds-last-year-still-good-or-do-i-need-buy-new-ones
- Borage: https://www.missouribotanicalgarden.org/PlantFinder/PlantFinderDetails.aspx?kempercode=b765
- Breaking the ice: https://extension.unh.edu/blog/breaking-ice
Transcript
Transcribed by https://otter.ai
Nate B
Greetings Granite State gardeners. If you dream of having fresh herbs at the tips of your fingertips year round you have tuned into the right podcast. We'll go well below the surface level on growing herbs indoors, leaving no stone unturned and sharing proven tips and solutions for helping your indoor herbs thrive. I'm Nate Bernitz, joined by my co host, horticulturist, and extension educator, Emma Erler, and this is Granite State Gardening. Let's get into it.
Emma we're talking about growing herbs indoors today, a really natural place to start is what herbs do grow well indoors, what herbs aren't going to grow well indoors?
Emma E
it's an important distinction to make, because some things can be grown really successfully indoors, and some obviously can't. The way I like to think about it is dividing herbs up, first off based on their growth habits. So you have herbs that are either perennial, annual, or biannual. And in my experience, I have some good success with some of the annual herbs, as well as some of the tender perennial herbs bringing them indoors.
Nate B
I guess another distinction that I think of is what you actually do with the herbs. I think of culinary herbs and medicinal herbs. And it seems to me that what I really want inside my house other is culinary herbs, because it's really just an even more convenient kitchen garden, I really just want to be able to go and chop some herbs, you know, any time of year, and be able to, to work with them in my kitchen. And that's kind of frustrating during the winter. Because we get spoiled over the summer. You know, for me, especially I love going and harvesting cilantro. So that's, that's my motivation, I want to be able to harvest herbs like that all year round.
Emma E
Oh, I'm with you. Yeah, culinary herbs are definitely where it's at in terms of trying to grow things indoors, think of you know what you're going to use over the winter the most. And then try to figure out you know, whether it makes sense to grow that indoors or not. So for me culinary herbs that makes sense anyways, to try to grow indoors are basil and cilantro. And those are two herbs that I use all the time. Those are also really easy to start from seed, they're annuals. So they are going to complete their lifecycle pretty quickly, you know, if they're outdoors just within a single growing season. And by that, I mean they're going to go from seed to flowering to producing seed in a single year, and then they're going to die after they've produced that seed. So these work really well indoors, I think just because they do grow so quickly. So you can be harvesting a lot, you can be planting these things successfully and having them go for quite a long time. Some of the tender perennial herbs, I think work really well for this too. So if you're wondering what those are, like rosemary, lavender Bay Laurel are just a few examples. And these are plants that wouldn't survive outside if you left them out there to begin with, but you can bring them inside in the winter, you're not gonna be able to collect a whole lot from them, but you'll at least be able to maybe grab a sprig here or there throughout the winter months.
It's time to the featured question, the part of this podcast where we answer something our audience has been wondering about. This week, I want to talk about germination testing. Most gardeners probably end up with some leftover seeds after the gardening season, or they've saved their own seeds. And they want to know whether those seeds are still good or not or whether they need to order new ones. Fortunately, it's really easy to do a germination test at home to figure out what percentage of those seeds are viable. So all you're going to need to do this is paper towels, plastic bags, and a warm location in your home. So to start, what you're going to need to do is damp in a paper towel. I find that using a spray bottle is the easiest way to do this. So lay your towel out. moisten it with a spray bottle just to the point where it's it's moist but not dripping. Next, you're going to take the seeds that you have and evenly spaced at least 10 in straight rows about an inch from the top of the towel. The more seeds you use, the more accurate results are going to be. But I'd use 10 as a baseline. After that, all you need to do is fold the bottom of the paper towel over the seeds, then roll it up and place it inside of the plastic bag. This doesn't need to be a real hard process, you just want to make sure that those seeds are staying in place and evenly spaced within that paper towel. Once you have the seeds in the bag, you're going to move them to a warm location that's out of direct light. For me in my home, I find that the top of the refrigerator is the perfect place for this. Now, after you've waited, let's say three to five days, go into that plastic bag and just check the seeds to see if anybody has started germinating. The test is going to run until either all of the seeds have germinated or the typical number of days to germination has passed. So if your seed packet says seeds germinate in seven to 14 days, then after 14 days your test is totally finished. But it's possible the seeds might germinate earlier. to actually get the germination percentage. Once you've finished your test. Once that amount of time has gone by, all you need to do is divide the number of sprouted seeds by the total number of seeds in the test and multiply that by 100. So if I started with 10 seeds, and six of them germinated, I divide six by 10. Multiply that by 100. And I'd come up with 60%. Now if the percentage is pretty low with your germination test, then you may want to order new seed. So let's say less than 50% of your seeds germinate, then you'll probably want to place an order. One thing you should note is that germination rate tends to be much higher indoors in a controlled environment than when seeds are sold in the garden. So let's say you have carrot seeds that you're going to put directly into the garden, you're not going to plant them indoors, you're going to want a germination rate, that's, I'd say over 50%. But no reason not to at least try out old seeds that you might have left behind, you might be surprised, they might still be viable. So a germination test is a really helpful thing.
Nate B
So for those tender perennials, if you're growing rosemary, lavender or something like that, there's kind of two ways to do it, right, either in the ground, actually in your garden, or in a container, I would think that if you plan on bringing them inside over the winter, you're probably not going to want to dig it up. So it might make sense to just grow it in a container that can go inside and out year round.
Emma E
To me, that makes a lot of sense. And actually, in practice tends to work a little bit better if you have plants already in pots. So like you said, some of these things might be nice if you have an herb garden that's actually in the ground to plant a Rosemary plant in the garden. But if you want to be bringing that plant inside, once the season's over, it is going to be a bit easier on that plant itself. If it's been growing in a container all the way along. I think a big reason for this is that you have to seriously disrupt the root system, when you dig that plant up to bring it indoors. And that transition from outdoors to indoors can already be kind of tough on a plant. So when you've removed a good part of its root system or stressed it out in a way, it tends to not be quite as successful. So what I do with some of these things, so these tender perennials, the plants that can survive for years and years and years, but our climate in New Hampshire is just too cold for them to be able to grow outdoors, as I plant them in pots to begin with. So that for me is rosemary, definitely lavender, perhaps lemon verbena, the bay Laurel that I mentioned, and actually some varieties of sage to other perennial plants that I'll mention that can potentially grow okay indoors are chives, and mint, and possibly lemon balm. These are plants that aren't gonna grow the whole winter at some point they probably are gonna go dormant. But they they are adapted to shade your locations so they can come inside and do all right.
Nate B
I've noticed I haven't heard you talk about two of my favorite kitchen herbs, thyme and oregano. Can you grow those indoors?
Emma E
Thyme and oregano are tough. I'd say if you have a greenhouse in your home where that's gonna get full, full direct sun, then you might be able to grow those pretty well. But if you're just trying to grow inside your house, you're probably not going to have quite enough light to keep those happy. The other thing too is that most perennial plants that are temperate meaning they grow in colder climates like New Hampshire are going to want to go dormant In the winter, and that's triggered by cooler temperatures, which, obviously you're not going to have inside your home. But it can also be triggered by changes in baling. So these obviously start getting shorter when we get into the fall and winter. And that triggers a lot of these plants to bring a lot of their energy down from their leaves and stems into their root system, because they've adapted to grow in climates, where they need to go dormant to survive a certain, you know, a winter period. So these guys, even if you bring them in, even if they have plenty of light, plenty of water, they do tend to die back. And in my opinion, it's not really worth bringing them inside at all, I would much rather just plant them in my garden, they're plenty hearty enough to have outside. And if I feel like I need to have, you know, plenty of my own herbs through the winter, then I'll just harvest a bunch and dry them or preserve them in some ways that I can enjoy them through the winter, until they start growing again in the spring.
Nate B
So going back to those tender perennials, again, rosemary, lavender, some types of sage, you don't want them to go dormant when you bring them inside your house because you want to keep harvesting them right. So is that just gonna come down to light? You know, making sure they're in a bright window? Do you need to potentially provide supplemental lighting? How do you keep them going?
Emma E
That is a really good question. So it's gonna actually depend a little bit based on what you're trying to grow, and where that plant grows naturally in the wild. So let's look at rosemary, for example. This is a plant that's native to the Mediterranean, where there's going to be a mild climate year round, plenty of light year round. And it's not ever going to totally go dormant. Growth is going to slow a lot, I mean, basically come to a stop. But the plants not going to lose its leaves, which is what we often think of with dormancy. So you're not going to be able to harvest a whole lot off of this plant. But it's, it's still going to be there. A plant that is going to pretty much entirely go dormant, even if you bring it indoors is lemon verbena. And this is a plant that's going to drop its leaves, as soon as that that daylength starts to get shorter. So you can absolutely keep it alive all winter, once you have it inside. But there's nothing that you're going to be harvesting off of it, you're basically just keeping it going until you can plant it outdoors again. And this is kind of true for houseplants across the board, including herbs. Even if there isn't, you know, a true dormancy period, meaning that plant totally dies back growth really, really slows down in the wintertime. So you're you're maybe only getting one new leaf here and there, you're not getting inches of new growths that are good for harvest. But if you do have some of these tender perennials that you want to keep going, you are going to need a really bright sunny place in your home. So south or west facing window, even in the wintertime, even if you have a plant in that, that really bright spot, that south facing window is really going to be more like a shady location in the garden. So it's not going to be perfect. But it's probably enough to keep it going. If you don't have any sunshine at all, then you are probably going to need to bring in some artificial lights, which you know, is a topic in and of itself. And what I found is helpful for at least the the perennial herbs that I've tried to save is to keep them in a cooler location in my home. So if you have a sunny three season porch, that seems to be the best spot for things like like rosemary and Bay Laurel, just so that they can experience more of a mild winter. But really, you're going to get the most out of this plant. Once you get back into the regular growing season.
Nate B
You know, when you talk about light, I think of kind of two buckets. One is supplemental light for the herbs that are already growing. The other is that whole realm of seed starting, and if people want, we could do a whole episode on that. So we're not going to go too much into it. But I mean, how do you think about seed starting for herbs? And I guess we're going back to those annuals, right? Our basels, our cilantros.
Emma E
You're absolutely right. You can pretty much start any herb from seed. But in my mind, it makes the most sense to start the annual herbs from seed just because they grow pretty quickly, they germinate pretty quickly. Some of those perennial herbs are going to take weeks and weeks and weeks to germinate. The growth is going to be very, very slow, and you're not going to be able to harvest anything from them for potentially, months, if not years. So the annual herbs make more sense. So in my mind, if you're going to be trying to grow some nice things indoors, I think that basil and cilantro, now maybe dill, maybe anise, probably make the most sense to try from seed. And, you know, you really don't have to do anything too special. If you're already familiar with seeds starting growing basil and cilantro from seed is really not outside the realm of seeds starting in general, but you are going to need to have a light source for these, a south facing window is rarely enough for seeds starting especially in the winter, you're you're looking at, you know, probably no more than, you know, six hours of really bright light. And that's just not enough. So most folks are going to need some sort of lighting setup. Now for home gardeners for home seed starters, we usually recommend just getting some fluorescent lamps. So a shop light set up with a couple of fluorescent tubes. These are inexpensive, we know they work really well. And that, you know, they're easy to find, you can get these just at the hardware store, cool light bulbs. So fluorescence come in really two colors, you can get warm white, or you can get cool white. Cool white tends to be better because it provides more of the wavelengths that plants need to grow so that that blue light in particular. LED bulbs are also getting more popular for for indoor plants. And for seeds starting, they tend to be more expensive, still. And there, there's a lot of options online, but a lot of them don't really have a proven track record, if you will. And there's still lots of research going on here on which led us have the right wavelengths for plants. But none of that's being done on a home horticulture scale. It's this is more for large scale plant production.
Nate B
Something our colleague, Jonathan Ebba, has told me, and I'm sure you've heard this, too, that when you're shopping online, and you see an inexpensive LED light that says that it's great for plants. If looks like it's too good to be true, because it almost certainly is.
Emma E
Yeah, it's such a good point. Oh, usually, I think that's kind of true across the board. But yeah, if something seems too good to be true, it most likely is so I come back to using just a real simple fluorescent setup, like yeah, it's not gonna be quite as efficient as the LEDs, but we know that it works really well. If you are going to, you know, buy a lighting setup for the first time. And if you have the money to spend, I think sometimes your best results are if you actually buy from a seed or Garden Supply Company, because at least then you get the customer support. And these things should have been tested or vetted in some way. So you know, these are these are going to be decent, rather than just going online. So reputable company, I should say.
Nate B
Okay, so I have a few questions here. I know we don't want to go too much into it. But when you're shopping for fluorescent bulbs, you're seeing a few different things on the package, right one is you're going to see this t-something number you might see a wattage, you sometimes see combinations of different types of light, maybe like a cool and a warm. So can you be any more specific about what you're looking for? And is there a difference between the lights you might be looking for, for seed starting verse, actually just giving supplemental light or all the light that your herbs need that are already growing?
Emma E
Yeah, thanks for that question Nate. So for the home growing T-8 or T-5 fluorescent bulbs are what you're looking for. And I would actually go with the T-8. If I if I were you. They they come in two color spectrums, basically. So what's called either cool white or warm white. So cool white is more of a bluish range. warm white has more of a warmer glow to it, but more like an incandescent light. What plants need for photosynthesis are basically two wavelengths of light primarily so you need blue light, and red light. So if you think of you know all the colors of the rainbow, those are those are all a different color spectrums of light, but plants are really needing that that blue and the red. The blue is particularly important for leaf growth and shoot growth. The red really comes into play If you're trying to get something to flower, and fruit, when we're growing basil and we're growing cilantro, we're really only focused on that leaf production. So using the cool light bulbs is totally fine for growing those plants out. And you can use those exclusively. If you wanted to, if you wanted to provide, you know, more more complete range of light for those plants, then you could say in a two bulb setup, get a cool light bulb and a warm white bulb. But it's not not absolutely necessary for houseplants in general, no, unless you're growing something that you're in, you want to flower, cool light bulbs, there are plenty. So I mainly grow foliage plants indoors, cool light bulbs are it for any of your tender perennial herbs that you have for over the winter. Again, that cool light is is plenty, although you could potentially get something that's that's full spectrum or mix the the cool and warm white. Sometimes if you go to those Garden Supply catalogs, they may advertise bulbs that are a full spectrum that are perfect for growing plants. But the the flowering is not something that we're necessarily trying to achieve on these plants. So just providing that blue light is the most important thing.
Nate B
Right? I mean, actually, with these annual herbs, quite the opposite, you do not want them to flower, which is potentially an advantage of trying to grow them inside, right. That's such an issue for basil and cilantro. Sometimes people get so frustrated, they bring them outside and it feels like almost immediately they start to bolt, or you know, start to go to seed.
Emma E
And some of that is related to temperature too. So indoors, you're going to be able to control the temperature a bit more. Cilantro often bolts as soon as you get really warm weather. This is an herb that likes cooler temperatures and tends to produce better earlier in the spring. So a lot that goes into it. But if you're just trying to produce plants indoors, you're probably going to be harvesting them at a smaller size to begin with. So you should be able to catch them before they bolt. I would not be concerned about getting flowers in your indoor setup.
Nate B
Okay, one more question about light before we get into things like temperature? Do you just run the light when the sun rises and shut the light off when the sun sets? Are you doing it correlating to the sun? Or is there actually just a number of hours that you're targeting.
Emma E
So you if you're using that supplemental light, you actually are trying to give the plants what would be closer to summertime conditions. So right now, in the wintertime, the day length is really short. So we want to we want to extend that quite a bit when you're using indoor lights for seed start. And once those plants have germinated, you're looking to give them probably 14 to 16 hours of light a day or so. And that's that's going to promote optimal growth. You don't need to have the lights on 24 hours a day, for some plants. There, they actually develop properly with at least a little bit of darkness today, plus you save some energy. But yes, you're definitely going to need to have them on longer than than just the the outdoor photo period time. So, you know, for let's let's say 14 to 16 hours, which would be ideal, maybe as much as 18 hours.
Nate B
Okay, so maybe you don't want to have these in your bedroom so you can get some sleep.
Emma E
Yeah, ideally, the basement setup works really well. I mean, when you're using artificial light, it really doesn't matter where you're keeping the plants at all. But yeah, bedrooms, probably not the ideal spot for your gardening.
Nate B
Okay, so kind of moving away from light, is the level of humidity in the average house appropriate for herbs or do you need to, you know, kind of increase the humidity with a humidifier, something like that.
Emma E
This is you know, it kind of depends a little bit. I think that in most cases increasing the humidity is going to be beneficial to a certain extent. Our homes in the wintertime can get really dry. As I'm sure you've noticed, my house gets really really dry when the furnace is running the heat sawn wood stove is going and this is not only causing the soil to dry out really quickly, but it can cause plants to lose to shed a lot more water from their leaves to which if you're not really careful or depending on what the plant is you can end up getting brown crispy edges on those leaves, which is obviously not something that we want when we're growing herbs. So increasing the humidity around plants can be really helpful. This might mean integrating a humidifier into your setup. If you're really passionate about growing plants indoors, a humidifier is something that you're going to want to get at some point. If you don't want to go that far, simply grouping plants together is helpful to increase the humidity a little bit. So basically, we're going to have a whole bunch of plants together that are shedding water out of their leaves, and keeping the humidity up around each other a bit more. Something other people will sometimes do to is put the potted herbs on top of a tray that's filled with pebbles and just a little bit of water. So those pebbles keep the plant from sitting in the water, because that's not good for the root system. But there as that water evaporates, it's increasing humidity there. One thing you do need to pay attention to is air circulation. So if the foliage is is actually getting damp or wet, then you can start to potentially have some some fungal issues. And not necessarily but if you have the humidifier directed right at the plants, and there's no other moving air source around, then setting up a fan, you know might be helpful. But this is all this stuff is something you're going to need to play around with, right? Like I can't give any real specific directions here. But you know, it's just kind of part of the fun of trying to figure out your home herb growing setup,
Nate B
right, Absolutely. And so part of it is your house and the kind of natural humidity and air circulation in there, which is going to vary. Another thing that varies really just based on personal preference is the temperature that you keep your house. You know, people are typically keeping their homes between 60 and 70 during the day, then personal preferences are probably coming a little bit more into play for those overnight temperatures. So what kind of ranges are you aiming for, and you know do you need to be worried more about going too low or too high on temperature for herbs,
Emma E
my thinking is more you have to be worried about going too low. So 60 to 70 that that's probably the really the the minimum range for being able to grow these things indoors, or at least least the annual herbs that we're talking about. So that the basil and cilantro primarily 60 to 70, I'd say is your bare minimum, especially for first starting seeds, you could definitely go higher basil loves loves heat. So if your home is closer to 80 basil is gonna love that. If your home is a little bit colder, and you don't want to be heating the air quite that much heat mats can be can be helpful. So actually putting an electric mat beneath the plants that are warming the soil, at least for seedling germination, warming the soil is far more important than having the air around that pot be warm. So that that works pretty well. And then once the plants are established, again, that 60 to 70 degree range is should be perfectly fine. Overnight, I would definitely try to keep the temperature at least 55. Once you get down to 50 or below that's that's when you start to have some issues with basil. It's really a plant that likes warmer temperatures. So I'd say minimum 55 which you know, I think for a lot of people is is reasonable. And if you have a zoned heating system in your home, you might be able to just keep a room that's the right temperature for your herbs.
Nate B
Okay, well that makes sense. Easy enough. So, in terms of, you've mentioned the soil, are you using the same type of soil or really, you know, potting mix, right, that you would use for houseplants or are you using more of a container mix that you might use for growing you know, herbs outdoors in you know, a container or, you know, window box or something. What's ideal.
Emma E
In my mind, the ideal setup is is a peat based potting mix. So something that doesn't have any mineral soil component to it. It's it's just peat moss, maybe some perlite, maybe some vermiculite mixed in these mixes are really nice and light. So they hold moisture, but they also drain pretty readily. The issue with some of these garden soils that you might use in a large outdoor planter is that they get really heavy and they both dry out quickly. They also don't drain all that well. It's this it's this weird paradox so they don't work all that well. So you'll be able to find something suitable that's either has a houseplant on the labels. Or just has, you know, vegetable plants you just need look for something that's, that's peat based and as we say soil less, so no soil component in it.
Nate B
But my experience is that those pure peat based mixes are just more expensive. You know, like you see some of these, you know, container mixes that have all that, you know, those bark products and everything in them, and they're just more affordable.
Emma E
They are, yep, they definitely are. But if you really want to be successful, it's worth spending the extra money. And a lot of times those products come in really big bags. So you buy one, and as long as you have someplace you can store it, you'll be working on the same package for a long time. I know I, I have the big bale of peat-based mix that I've had in my basement, probably for the last three years. And I just keep chipping away at it.
Nate B
Yeah, I was just telling you yesterday that we keep ours in, you know, trash bags in garbage cans in our garage. So that works pretty well. But I mean, it's good to know that. Yeah, it's more expensive, but it's actually more expensive for a reason. You're not just spending more to spend more. I mean, so I think that kind of helps with the the bitter pill of spending a little bit more on what just seems like dirt, but it's not dirt. That's the key.
Emma E
It's not dirt. Yeah, that's exactly it. We can't even really call it soil. A lot of times we call it potting media, rather than soil because there is there is no true soil component.
Nate B
Yeah, if you want to sound like an expert start calling it media. Exactly. All right. So I guess the next thing I would ask for, so with my houseplants I stop fertilizing over the winter. And don't start up again till spring. Do you treat herbs the same? I would think maybe not because you actually are trying to get them to grow and produce. That's the point of having them inside, right?
Emma E
Yeah. So with with herbs indoors, you are going to need to fertilize and you're going to need to fertilize consistently. So let me back up a second. So those tender herbs that you brought inside, or those tender perennials that aren't growing a whole lot, you know, particularly something like that lemon verbena that's lost all its leaves, and it's just sitting there in a pot. fertilizer is really not necessary in this situation. If your rosemary, let's say, or lavender, seems to be putting on a bit of growth, if conditions are favorable enough, then maybe you're fertilizing once a month or so but you're probably not needing to fertilize more than that. However, if you're growing some of these seedling plants from seed, so that basil or the cilantro that you want to be growing pretty quickly, putting on a lot of growth, yep, you're gonna need to fertilize. And so what I would recommend using is just a general purpose water soluble fertilizer that contains all of the major macronutrients and some micronutrients. So a lot of times, it's those blue crystals that we're looking for, for production indoors. The other alternative is using an organic fertilizer. The reason I don't recommend these, because a lot of people like would prefer to use organic for their plant production is that organic fertilizers require a microbial community. So basically, living organisms that are in the soil that are going to break down those organic nutrients and make them into forms that plants can take up verses that complete fertilizer, that those those nutrients are already in forms that plants can use. When you're using the ideal peat based mix indoors, there's no microbial community in that mix. So there's there aren't any bacteria or fungi that are that are there to break down organic fertilizers. So they're just not going to be as effective. Those are going to be a much better choice when you have your plants in the ground in the garden. So the blue crystals, that's what you want, I'd say, maybe once every one or two weeks for your seedlings. And you don't want to do too much because you could end up burning the roots. And if the plant growth is too vigorous, then a lot of times the foliage just isn't isn't as fragrant doesn't have as much flavor. It can be lower in those essential oils that that make herbs so good.
Nate B
It's funny when I think about organic gardening, organic farming, you know the adage is feed the soil, not the plants. The problem, going back to what we were just talking about is when you're growing herbs indoors, you're not using soil so you can't feed it
Emma E
right exactly. Yep. Yeah, like we just said you're using this this peat mix so there's there's no soil, there's no feeding it you just need to give the plants what they need,
Nate B
kind of going to personal experience for a second. I've had issues with spider mites on herbs indoors or herbs in a garage. So I'm guessing I'm not alone in dealing with that pest. I haven't dealt with any others on the herbs, but what pests would you say are kind of the top enemies of your indoor herbs? And well, importantly, what do you do about it?
Emma E
Ooh, wow. Yeah, the the big three, I'd say are probably spider mites, aphids, maybe white flies. fungus gnats can sometimes be a problem too, but they're usually more of an annoyance for people and maybe pets, then then a real problem for the plants. spider mites, like you said, I think are probably the number one for me too. And you'll know that you have these if you're looking at the leaves on your plants. And you're seeing these these little yellow little stippling dots on the leaves. And these are the basically the the spots where these very, very small little mites have been feeding on the foliage. They're called spider mites to because they do produce a really fine webbing that is kind of like spider webbing. So if you're seeing this, this little yellow stippling and webbing in between the leaves, you've got spider mites, and the reason that these are such an issue indoors is that they tend to really flourish under hot and dry conditions. So you know, what do we have in our homes in the winter, you know, at least warm and typically very dry conditions. aphids can sometimes be a problem too. I would say these are mainly going to be an issue. If you brought something in from outdoors, it's not like they're they're just going to come out of nowhere, but they're going to be the biggest problem on your your seedling plants that are very young and tender.
Nate B
PPE was nothing new to Rachel Maccini. Following label instructions for personal protective equipment is as ingrained as brushing her teeth and tying her shoelaces in her daily routine as UNH extension's pesticide safety education coordinator. now for Rachel's Integrated Pest Management, IPM for short, featured tip.
Rachel Maccini
CULTURAL MANAGEMENT includes thoroughly examining your plants prior to purchasing and introducing them into your home. aphids and spider mites can be noticed by looking at the leaves and stems closely. You can also gently tap the herbaceous section of the plant over a light colored surface. Usually we use white paper. If you have aphids and or spider mites, you will see them crawling over the paper. If you do see them, you could wash the leaf surfaces with water to remove the past and then periodically repeat this step of washing the plants going forward to prevent future infestations. Other cultural methods include things like proper soil preparation, proper sanitation, which includes removing problems sections of plants, and or disposing of highly compromised plants. You also want to look at changing irrigation practices this can reduce pest problems, since too much water can increase root disease. It is not complicated to have healthy pesticide free herbs with the combination of preventative control techniques plus a little patience IPM can help your herbs thrive.
Nate B
Okay, we've talked about this a few times Emma, but you're growing your herbs in something, maybe it's the pot that you're growing them outside in or if you're growing things like basil, cilantro that you've started from seed again, you have to grow it in something, any recommendations.
Emma E
Well, I don't know how important material is I think it's more important to make sure that pot has good drainage, you know, so what are your options to begin with, I think typically you're looking at either terracotta, some sort of glazed ceramic or plastic plusses and minuses to these, the glaze pots tend to stay the same, they tend to keep the potting mix moister longer because that water can't bleed out the side of the pot or it can't be whisked away by the pot. terracotta are going to dry out a little bit faster plastic are probably going to dry out they probably hold on to water the longest because that water is not going to be able to wick away from from the plant. I don't know that it matters all that much which one you have. So if you already have a bunch of plastic pots and use those likewise with the with terracotta or glazed, what's going to be more important I think is the size pot that you use. So a big issue for herbs a lot of times is that they they sometimes are kept too wet which can lead to root rot and that's exacerbated when you're using a pot that's really too big for the plant that you have in it. So with with seedling plants, you're probably going to be starting those just in little like seedling trays or maybe two inch pots. And as that plant gets bigger, you'll graduate it up to a slightly bigger pot potentially, where you have no more than, you know, an inch space from the plants root system to the edge of the pot. But the number one thing that you really need to look for in a container is drainage hole or holes in the bottom. So all pots that rarely for growing anything except for a wetland plant, something that loves the water, you need to have a hole at the bottom, at least one that's going to allow excess water to escape because root rot is a huge issue.
Nate B
Okay, so we've talked about starting these from seed, especially like basil and cilantro. But I mean, every time I'm at the grocery store, I see potted basil, and sometimes even potted cilantro, and you know some other herbs that are all ready to go, I can just bring them home. How ever not only have I experienced this, but so many other people have to where you bring home this beautiful looking potted herb. And within a few weeks Well, not looking so beautiful. What what's the deal? I mean, what should you start from seed? You know, what should you actually purchase? And should you, you know, consider purchasing some of these grocery store potted herbs.
Emma E
Yeah, sometimes it can seem like a bit of a scam, right? Because you have this basil plant or something, you're like, Oh, this is great, I'll have this for months, it'll just keep growing. And then it Peters out pretty quickly.
Nate B
I mean, I didn't used to think it was a scam, because I thought it was just me that couldn't keep them alive. Then I started to hear that, well, I wasn't alone. So maybe there's a bit to that.
Emma E
Yeah, so you can definitely keep these going for longer. But you do need to be aware of a few things. First off, those plants that are in those pots are often planted incredibly close together. So if it's whether it's basil, cilantro, sometimes mint I see too, if you look at the stems that are coming up from that soil, they are really, really close together. And so these plants are growing in pots that probably are only technically big enough for maybe one to three stems, but you have a dozen or more growing in that pot. So in order to really keep things going, the first thing I would do is work on thinning. So what I mean by that is actually cutting out some of those stems when you go to harvest cutting them at ground level, so that you're you're spacing things out. And I, I looked for you know, at minimum probably an inch to inch and a half, maybe two inches between those plants. So if it's basil, go in with your scissors and clip right at the ground. So once you have those spaced out a little bit more, and then you can start trimming them from the top. Another option too, if you don't want to, if you're looking to get a whole bunch of plants to fill up your whole window sill is that sometimes you can actually transplant these herbs by dividing up that root ball and planting them out into separate pots so that that's obviously more labor intensive, I tend to like the thinning method, but that that's going to work pretty well. The other thing to to keeping these herbs going, or keeping them alive longer, is just making sure that once you once you have thinned out the pot a bit that you're not over harvesting. So a good rule of thumb is to wait until those plants are at least six inches tall, and then not remove more than a third of the leaves. So you need to leave something there so that the plant can still continue to grow.
Nate B
Okay, I must say that advice is not super intuitive. But the fact that you seem pretty confident that doing those things is actually going to keep these herbs alive, not to mention actually produce, you know, multiple pots of herbs potentially. It's pretty exciting. So that feels like a hack to put in the back pocket. You know, so we've talked about, you know, buying some of these herbs, starting some of these seeds, something that I really like, just as a personal preference. And I think partially for aesthetics honestly, is I like combining herbs. I just really like the look of it. Is there anything that you can say about herbs that you know, can or should be combined or maybe some herbs that shouldn't be?
Emma E
Yeah, so this is I think especially something for people who like to keep herbs and containers outdoors of the summer and then my bring them in, often are paying attention to you really want to match herbs based on their watering requirements. So you want to have water loving if you you want to keep water loving plants together if you're going to put them in the same pot and you want to keep the plants that like a drier soil. away. So a couple of plants that that do like the drier soil or rosemary and lavender, these do not like to be sitting in a consistently moist soil, they like to be allowed to dry out more. Whereas basil, and cilantro, parsley, these all really like moisture. So they don't want to be soggy, but they do like to be consistently moist. So keep those together. Don't mix in a Rosemary with those, just because that plant is very, is very likely going to get root rot, because it's just not going to be getting exactly what it needs to be happy.
Nate B
Okay, I'll resist the temptation. But I would like the look of that, I'll admit, I may have tried that combination. Okay, we won't tell anyone. Okay, you mentioned taking herbs outside bringing them inside, what kind of process is there. So, I mean, it feels almost impossible to imagine right now, in this kind of early part of winter, but winter will end and it will come to spring and the weather will warm up. And, you know, it's actually kind of nice, because our houses fill up with all these plants that you know, like to be outside, they don't necessarily look their best all winter. So it's actually a really fun thing to look forward to bringing your plants maybe some of your herbs outside. But what kind of process do you recommend for doing that, so that there's a nice smooth transition?
Emma E
Well, the biggest thing is making sure those plants aren't gonna get too much light too fast. So all of these, these herbs, even if they've been growing in a bright south facing window, they are not going to be adapted to experiencing the full intensity of the sun, when you move outdoors. So what I like to do once and this is once the the overnight temperature is is really like 50 degrees or above, that's when we're looking at moving Outdoors is taking the plants out and exposing them to full sun for just a little bit of time a day. So maybe on day one, you bring them outside and expose them for an hour, a full sun and you bring them back in. Or and then then you know, then a couple days later do it for two hours, three hours until over the course of two weeks, you've gradually expose those plants to enough to enough sun, you've finally gotten up to like a full day. But you want to do that gradually, like I said over that two week period. If you're not up for that, if that that seems like too much work, then what you could do too, is move these plants outdoors into a shady location. So maybe under a tree, and then pull them out gradually. You know, same thing not indoors outdoors, but moving them from that shady spot the full sun for increasing amounts of time.
Nate B
Okay, I'm really glad you brought that second option up. Because I mean, anyone that goes to work, you can't do that. So it's good to have an alternative. Although I think what you're saying is option one is preferable, if you can.
Emma E
yeah, if you can, that would be great. If you can't, like I work, so I can't do that. So I'll be putting them in a real shady spot to begin with. And then might be trying to move them around my landscape where they're, they're going to be exposed to a little bit more sunlight during the day. So maybe it's you know, under under a smaller tree or shrub or the shade isn't going to be quite as dense. really the key here is that you're not putting these plants out in direct sun for the full day, right off the bat. Because if you do, what you're usually gonna see is a whole bunch of brown crispy leaves and a really, really unhappy plant.
Nate B
Am I love you talking about how you work. I mean, you talk about plants all day. It's kind of one of those working hard or hardly working situations. But yeah, well, we'll let you have that one. Okay, so the inverse of bringing them o
utdoors is bringing them indoors. Again, we're talking really about those tender perennials, right? Because those annuals if you're growing basil, cilantro, things like that outdoors, you're really probably just going to be starting your winter batch from seed rather than than trying to bring in those you know mangy herbs to try and keep going for a little while longer. But for those tender perennials, is there also a process for transitioning them into your home?
Emma E
To a certain extent Yes, I mean, if you're in a if you're in a bind, you can just you're going to get a frost, grab them, bringing them inside, but ideally, they're going to be a little bit happier if you can get them used to being in a bit shady or locations. So take them out of full sun, move them into a shady spot for a couple of weeks. Ideally before you're expecting a frost, so when the nighttime Temps start to approach 50 degrees. That's when you're working on this. I will also note that it's really important to scout for pests before you bring these plants indoors. One thing I like to do, I mean, clearly I'm looking at the leaves, top and bottom. But I also like to just spray them down with with a strong jet of water hitting undersides of the foliage and the upper sides to try to knock anybody off that might be on those leaves. So I was in mainly thinking, aphids and spider mites, and this and this. Yeah. In this setting.
Nate B
So at the very beginning of this conversation, we're talking about tender perennials, annuals, hardy perennials, and you mentioned a couple herbs that it depends. And that actually feels really important. Because when you're picking something to grow indoors, right, like you don't want it to be one of those really hardy perennials, those are going to be in the garden. So you mentioned sage, and you mentioned lavender. What varieties are we considering? What are your preferences?
Emma E
Yeah, let's start with sage. So the straight species, common sage, salvia officinalis, is plenty cold hardy to live in most gardens in New Hampshire, as long as the soil is well drained, it is a little bit susceptible to root rot. So zone four for straight common sage. However, there are a whole bunch of different varieties of sage, which are really only hardy to zone six, and I have never been successful keeping them in the garden over the winter. So one of those is golden stage, which the cultivars Aurea, actually there's another one called Icterina. There's also purple stage purple, purpurescens, or tri-color which has a three colored leaf, those you might have luck if you try to bring them indoors and keep them in a cool location in your home. So again, that's where that three season porch comes in. Another species of sage or salvia is pineapple sage, and that's hardy to zone eight. So that one, that one's definitely going to have to come indoors or just start over with it. Lavender too, is one that can be on the edge. There are two varieties that I think of or other I guess three that can live outdoors. There is lavandula angustifolia 'Hidcote', also 'munstead'. Those are hardy to zone five, but they definitely need good drainage and winter mulch. And there's also a hybrid lavender called 'Provence', that's hardy to zone three also needs Excellent, excellent drainage. A lot of the other potted lavenders that you might buy, though, if you've had it in a container all year, bring it indoors,
Nate B
okay, and the whole point of all of this have the right temperature and humidity picking the right varieties, you know, all these things that we've been talking about, is to get to that point where you're getting a harvest in the middle of winter, right. So What tips do you have on harvesting the right way?
Emma E
Well, the big thing, especially indoors is that you don't harvest too much. If you're starting things from seed, wait to harvest until the plants are at least six inches tall, and then remove no more than a third of the plant at a time. And when you make those cuts, ideally with sharp scissors or pruners cut right above a set of leaves or right above a node A few well for harvesting in general, peak flavor on herbs tends to be just before flowering. This isn't really a concern indoors but something that applies when you're growing herbs outdoors or in a greenhouse. And again, if we're talking about outdoors harvesting in the morning is important just because temperatures are cooler and you're less likely to get wilting. But the nice thing about growing indoors is that timing is really not so critical. You can just pick right before you need to use the herbs.
Well, it's time for my favorite segment of this episode and that is the featured plant. We're talking about herbs this week. So I figured why not talk about borage, borago officinalis. borage is a really cool annual herb that is native to Europe in the Mediterranean region. If you're not familiar with it, it's a it's what I call a sprawling annual. This is something that grows one to three feet tall but it it may not totally grow up right maybe kind of sprawl here and there throughout your garden. One of the best things about borage is that it has these really really beautiful bright blue star shaped flowers that droop off the ends of the branch stems in because this is such a nice angle. You're going to get these flowers from June to August. That that blue color really is unrivaled in the garden. Beautiful, so borage use it in the herb garden use it in the vegetable garden use it in the annual border. It works anywhere. It's also a really, really good plant for pollinators. I've noticed that bumble bees and honey bees tend to cover it with when it's in full bloom and other long tongue bees as well because it's such a good source of nectar and pollen. And borage is also edible. So the the flowers themselves are attractive as a garnish. You can freeze them in ice cubes. You can garnish cold drinks with them, put them on desserts, salads, they have a nice mild cucumber flavor. The leaves of borage are edible too. And these are kind of a great green color with with bristly hairs that are that are very distinctive. The name borago for borage actually might come from the Latin word Bara, which means hairy garment referring to those bristly leaves which is kind of cool. And officinalis, which is the the species name means sold in shops. So this plant was once considered to have medicinal properties, although now we pretty much just enjoy it as something that's edible to be eaten raw or cooked. So those leaves when they're small and tender, they can be eaten raw in salads, or they can be cooked up like a pot herb like spinach, because they are kind of hairy. It might be nice to chop them up a little bit so that you're not feeling those bristles too much. But these definitely have a cucumber flavor. And they are you know, just really tasty. One thing to note though is that they are mildly poisonous and this This goes for borage as a whole. It has what are called payroll is pyrrolizidine alkaloids. Whoo, I had to give it a try. These if consumed in large amounts on a regular basis I get can cause some issues but as long as you're not eating borage every single day, it's something that you can you can enjoy here and there totally safely. If you do want to grow this plant, it's really easy to grow an average, dry to medium moisture, well drained soils, it actually tolerates poor low fertility, soils and drought really well. So for a lot of gardeners with Sandy New Hampshire soils, this is a good choice. It also likes full sun to part shade, which opens up a lot of opportunities in the landscape. And it can be either started from seed indoors or sowed directly in the garden in early spring, this plant will actually sometimes self seed under the right conditions. So in your garden, you might find that you don't have to plant it every year it seeds itself in and it's the gift that keeps on giving. I think I said this earlier, but I think borage is perfect for the herb garden, vegetable garden, containers, annual beds, those flowers are really stunning. And it's it's a worthwhile plant to have around whether you're going to eat it or not.
So Nate we're going to be getting outside of really my realm of expertise at this point. And that's, that's where we get into more of the culinary uses of herbs, starting off with preserving. So I'm more of a fresh herbs person or I buy, you know, pre dried herbs. But you know, what, what can you say about, you know, what do you need to do to preserve herbs? And in you know, what, what are basically the main considerations?
Nate B
Well, ideally, you are using as much fresh as possible. But I suppose there's only so many herbs you can possibly find ways to incorporate into different dishes at some point, if you're successful, you just have more herbs than you can possibly use fresh. So you really have quite a few options. Actually, it depends a little bit on your situation and your preferences. Also really just what you're doing with the herbs after So, freezing is one option, you're not going to want to freeze herbs if your primary use is as a garnish, just because it's not going to be that same kind of quality. But freezing is a really good option and I know of three different ways to do it safely. So one is you just take a few sprigs or leaves and you place them in a freezer or an airtight freezer container and you freeze them and that's it. That's the simplest method but it's also a low volume method. If you have more, you know maybe you want to spread on some sort of tray or cookie sheet and place them in the freezer and then once they're frozen solid then You can pack them into airtight containers. So this way, you're just going to be able to go through a lot more. One really cool method, and this is especially good If you're using a lot of herbs and soups and stews is first you actually wash them and then dice them really finely. And actually pack the herbs into ice cube trays, you just fill the spaces with water, stick them in the freezer, and when frozen, you just pop out these herb cubes, and you store in airtight containers until you're ready to pop them into your soup or stew. So pretty fun.
Emma E
So like, what's the expectation there? They're going to change color flavor in any way? Or are they still going to be pretty much what you'd expect using a fresh herb?
Nate B
They shouldn't. The color and the flavor should be pretty good. Because, you know, I, I think that sometimes people are using herbs that just aren't peak quality. That's especially true with dry herbs, where you just end up having to use a lot because the herbs just aren't that flavorful anymore. And that's because they just have, you know, been in the pantry too long, frankly, and not ideal storage conditions. And so they lose their flavor and lose their aroma. But these methods of freezing, you're really keeping the quality. So it's a great option.
Emma E
Okay, so if you're not into that method, freezing is not for you. What, you know, what are the main steps to drying to keep that flavor to keep the quality?
Nate B
Yeah, it depends. I'd say part of it is um, what type of herbs we're talking about. So you've classified your herbs by growing habit, you know, and you're talking about annual biennial perennial all that. When it comes to the preservation we're going to categorize them differently by whether they're sturdy, or tender. So sturdy herbs. I mean, this is very logical, right, Rosemary, Sage thyme, summer savory, parsley are really good examples. And for these, you can actually just tie them into small bundles of you know, some stems, hang them to dry. Basically, you can tie the stems together with a rubber band to get it into a cluster. The only piece of advice I would have here would be to make sure you're hanging them away from like a sink a stove a dishwasher, just because those areas are going to have more moisture and humidity. And while you want that for growing herbs, you don't want it for drying. Then for the tender ones that are just more fragile like basil, oregano, tarragon, lemon balm and mint. The only difference is I'd say that you should actually hang them inside paper bags. And you want to just kind of tear or punch some holes in the side of the bag, and then suspend again in small bunches. So they don't mold. If you use too many, there's going to be too much moisture in the inside of the bundle. You'll close the top of the bag with a rubber band. And then again, place it in an area of low humidity and good air circulation. What's great is that with this method, any leaves and seeds that fall off the bunch because they're tender are just going to be caught in the bottom of the bag. And then if you suspect insects or insect eggs, which is really more of a factor when you're growing outside, you can heat the herbs or seeds at 160 degrees Fahrenheit for 30 minutes or freeze at zero degrees Fahrenheit or lower for at least 48 hours. If you're growing them inside and they're pest free, you probably don't have to worry about that. There are other options though. So instead of bunching the herbs, you can actually just dry the leaves. So when bunching you're keeping them on the stems. For this method, you're removing really those choice leaves from the stems. This works pretty well for some herbs like mint and sage. So you just lay the the leaves on a paper towel spaced apart so they're not touching each other, then cover with another towel, then cover that with a layer of leaves. And you can repeat that layering process to about five layers. And then you can set in a cool oven to dry overnight. I mean this method the ovens gonna stay off, but like the oven light of an electric range, or even the pilot light of a gas range is gonna probably produce enough heat to facilitate drying in this way. But another method is just spread a single layer on a shallow baking pan and set your oven to the lowest Possible setting, so not above 180 degrees, if your oven will go to under 180 degrees, this method works not all ovens can get that cool while still being on. And the higher temperature is actually going to cook the herbs, which you do not want to do when drying them, you're not trying to cook them. In this method, again, you're propping the oven door open, and letting them dry in there for about three to four hours stirring periodically. Now, when people think about drying herbs, probably all of these methods leave you wondering, well, like what about a dehydrator? Isn't that an appliance that is literally for this purpose, literally for drying, fruits and vegetables. Yes. So if you are lucky enough to have a dehydrator, just preheat it, you know, between 95 and 115 degrees. In times where humidity is really high, like if you're, you know, in the south in the summer or something, you're probably going to want to go even to like 125. So you know, higher the humidity, higher the temperature. And so you rinse your herbs, shake to remove the excess moisture, and then you're going to place the herbs in a single layer on each tray. So your dehydrator may have a few trays, and between one and four hours, you should have dried herbs, I recommend checking periodically, just to see whether they're done. And you're going to know they're done in any of these methods because when you touch them, they're going to crumble and the stems are going to break when you bend them, then you know they're done. And you don't want to dry them really longer than you need to. And I would say if you're using a dehydrator. Yeah, these tips are good, but also refer to the dehydrator's instructions for more specifics on your appliance. In all of these methods, once you've dried them, you're going to want to place these dried herbs in airtight containers or jars with tight fitting lids. Glass really keeps the aromas and so definitely recommend glass. And again, the herbs must be completely dry. So don't shortcut this drying method. And you'll want to store your dried herbs in their glass container in a cool dry dark area away from light sources and heat. What you're going to find is that dried herbs are going to keep their flavor and color for about three months up to three months in your cupboard and up to one year in your refrigerator or freezer. So when with any food preservation, we always recommend labeling your containers to say when you actually preserved them so that you can consume them peak quality.
Emma E
All right, Nate, I know that you are a really good cook. So I'm hoping that you can give us a few suggestions on on basically how to use herbs and cooking, whether they're dried, fresh frozen, you know, just just a few tips to help us long hair.
Nate B
Why does it feel like you're buttering me up?
Emma E
Perhaps I am.
Nate B
Yeah. Okay, so the first thing is, for the frozen herbs, the ratio is going to really be about one to one for fresh herbs. So you don't have to do any calculations there. Same amount of frozen herbs as fresh herbs but for dried herbs, especially when you're doing all this stuff, right and they're a great quality, they're going to be between two to four times stronger, probably more like three to four times stronger than fresh herbs. So when we're substituting dried herbs for fresh herbs in a recipe, we're going to use a quarter to a third of the amount listed for that conversion. I'd also just recommend don't overdo it when using high quality herbs, which yours are gonna be if you've dried or freeze them properly stored them properly. And if you're using while peak quality, you know less is more if you're following a recipe, you know, don't don't throw more in there. And if you're kind of concocting your own recipe, making some sort of blend, I would recommend really just emphasizing one strong tasting herb. Rather than taking multiple strong tasting herbs and combining them as being you know both featured herbs it's just going to be too much on the palate. So you know really be deliberate about that you want a leading herb combined with a few less pronounced flavors. And there are a couple you know really nice ways to blend herbs. an herb butter or or herb oil are both really gourmet options. And I can talk about that if you want but unless using herbs as a garnish, you typically want a chopper Pretty finely, a more even grind in a mortar. So your herbs just have more surface area. This is especially true when making a blended butter or oil, but just in general, you want to chop them up fine. And I'd say chop them up finely, right before you're going to use them.
Emma E
Alright, so I've already learned a few things that I definitely do wrong. So featuring an herb that's, that's great advice. I think sometimes I think more is going to be better, but I know that I have found that that is not true. So, you know, one thing too, that you know, I think we may or may or may not pay attention to is how long these things should be cooked, you know, is there a difference in your mind with a fresher versus a dry eater versus a frozen urban in terms of you know, how long you're cooking these things when they should be added?
Nate B
Sure. I mean, no matter what you don't want to cook for too long. The the fresh herbs, maybe for a little bit less time because they don't need to be you know, rehydrated, reconstituted. But just in general, don't cook for too long, I will just share a good trick. And this is going to kind of highlight this principle for making soups and gravies. What you can do is tie sprigs of fresh herbs in like a bouquet, or place ground herbs in a cheesecloth bag and add them about a half hour before the dishes done cooking. It's gonna maximize the delicate aroma and flavor of your herbs in the dish. And then you remove them. I'm, I mean, this is not something that, you know, I used to think of doing I would used to think oh, you just add all your herbs at the beginning. And then they're just part of the dish, but we're often leaving a lot of flavor on the table when we overcook our herbs. So you really just want to cook them long enough to get flavor infusion. And not any longer.
Emma E
That is so interesting. Again, something that I know that I've done wrong.
Nate B
Well if we're gonna go through all the effort of growing herbs indoors, we might as well use them right.
Emma E
Before we finish an episode, I also like to share a closing gardening tip, just that you have a little something else that you can use in your landscaper or within your home. So because it's winter time, I think it's appropriate to talk about rocksalt and whether you can use it near the garden. So clearly in New Hampshire, removing ice is a priority, especially on driveways, walkways, any other hardscape area on your property. And a lot of us are going to lean on a de icing salt to clear that ice to make it safe. But the bad thing is that de icing salts can definitely be harmful to soil and plants that are growing near these paved areas. So using as little as possible is key in order to prevent damage to not only plants themselves and that soil, but also the the concrete or other hard surfaces. Accumulation of salts in the soil actually can change soil structure and it can make it more difficult for plants to absorb water. from plants themselves, the roots can get burned and you can see wilting and scorching of leaves. Typically in the summertime after after we've gotten through the winter. ice melt products that you can purchase always contain a chloride or I should say most often contain a chloride based salt. So these are things like sodium chloride, calcium chloride, potassium chloride, that you can you can purchase regularly. Sodium chloride, also known as rock salt is the least expensive option. This is what gets used on public roadways. The problem is is that it can seriously burn plants and into their roots. So not something that I would use on on the sidewalk or or home driveway if you can help it. It's also a source of pollution as well when it runs off the landscape. Calcium Chloride and potassium chloride are a little bit friendlier to plants. But overused can still be deadly. And all of these things you're gonna see these ingredients on product labels, so just look for these terms. Magnesium Chloride is another option. This one's a little bit friendlier to plants. It's a little less damaging, and it's often found in some of these petsafe materials. Probably the best option though is calcium, magnesium acetate, or CMA, which is actually a formulation of dolomitic limestone and acetic acid. This one is by far the least harmful to plants and pavement and it's often recommended for environmentally sensitive areas. The downside of course, is that it can be expensive. Overall, you know if you really want to protect your landscape limiting de-icer use as much as possible is key. That can mean clearing snow as close to the ground as possible and as soon as possible after a storm to limit ice buildup, and if you can, using sand or wood shavings to provide traction is the best option for your garden. Of course, these are messy and will require some cleanup in the spring. One final thought is that if you know you're gonna have to use a fair amount of de-icers is to plant salt tolerant perennials, trees and shrubs, near walkways, driveways, any place that's potentially going to be salted.
Nate B
Our goal with the Granite State gardening podcast is to explore the world of gardening and help you achieve success in your garden. We're sticklers for research based information here at UNH extension. See you can count on us to share proven tips and solutions. We want to meet you where you're at as a gardener. So we're going to count on your feedback. What topics Do you want us to explore with you is the information we're sharing too advanced too basic, we're just right. Email us at GSG.pod@unh.edu. Did you enjoy this podcast? If you're listening to this podcast on the UNH Extension website, make sure to subscribe to the Granite State gardening podcast on the platform of your choice whether it's Apple podcasts, Spotify, Google podcasts, Stitcher or wherever you find reputable podcasts. As a brand new podcast we would greatly appreciate if you would want to share this podcast with fellow gardeners and too if you enjoyed this episode consider giving us an effusive five star review wherever you're listening. That's gonna help other gardeners find us. Thanks for tuning in. keep on growing Granite State gardeners we'll see you next time.
Granite State gardening is a production of the University of New Hampshire Cooperative Extension and equal opportunity educator and the views expressed on this podcast are not necessarily those of the university, its trustees, or its volunteers, inclusion or exclusion of commercial products and this podcast does not imply endorsement. The University of New Hampshire US Department of Agriculture and New Hampshire counties cooperate to provide extension programming in the Granite State. Learn more at extension.unh.edu
Author(s)
